Showing posts with label SID. Show all posts

SubAtomicGlue's SID

While searching for midibox SID stuff I stumbled upon Subatomicglue's super-extensive build log. He has info on almost every aspect of making a SID synth. It follows the panel design of the original Midibox SID made by T.Klose and it is packaged inside a Commodore 64.


He has used a custom made panel (Made by Schaeffer)


and he is quite good with the soldering gun :)


More of it on his work log

Caniballizing the laughtop

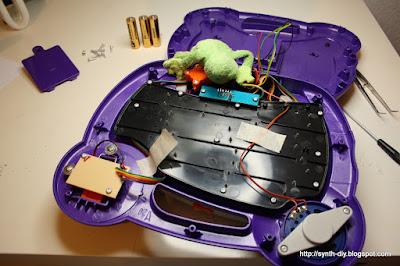
What follows is the destruction of the laughtop. This is not for the faint of heart!


Braska is here still, helping with the hard stuff (posing and getting in the way). When I tell him "get the screwdriver" he always appears with a cocktail in his froggy hand, sipping.


There is a small, lo-fi speaker which I just might keep!


The "mouse":


This will host a rotary encoder when finished:


Closeup of the lo-fi speaker


Name of frog spelled in Greek: (missing the last α) "ΜΠΡΑΣΚ(Α)"


Lower part done.. now to the screen disassembly


This spring is what keeps the screen in position


Braska sits on laughtop's screen and brain.


Screen, off


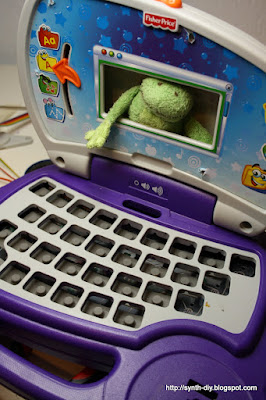
We like "windows"


Well, this is nice!!


Now, some cutting of plastic parts (specifically, the battery compartment) must take place.. I will have to replace the heat sinks also on the sid because they are BIIIIIIIGGGGG..

SID Repackaging

Remember the babyBotte ? It started it's life as a simple shoebox and then got upgraded to a package that is sturdy and useable with a jack for external PSU so I wouldn't have to rely on batteries.

Same story about the Music from outer space WSG that got a serious upgrade and became a module

Not to mention the AVR-Synth that was repackaged, twice

Well today, another project is starting.. Packaging the Midibox SID to an item I had to wait long to get my hands on!

Being a parent has the advantage of being around toys all the time. The one here is the perfect packaging for my SID synth :Fisher-Price Laughtop . So i got the kids another saying that this was broken and started with Braska to ponder on how to put the SID in.


This is it. with Braska on top..


Since the SID needs at least one rotary encoder, we were thinking of putting it where the laptop mouse now lies. I would make a nice flat round, orange painted knob to put so it doesn't stand out a lot.


At the back there is an abundance of space. Considering that we will have to accommodate two MIDI sockets, two audio jacks (1/4") and the power jack, it should be just enough..


Inside, there are lots of keys (Greek version laptop has 24 keys plus a bigger green enter-like button). The minimum amount of keys to be used is 6. I could wire the others to different functions of the SID. Eg you could have one key, bring up the resonance/cutoff control so with the encoder you could have realtime fun with it.


As you see, the 20x4 White-on-blue screen is EXACTLY the size of the laptop opening. This would look great when finished!!


The next step is to gut the laptop. This will probably be done this weekend because from Monday morning, Braska will be on a (rather big) trip. More on this later on.

Stay attuned!!!

A working SID Synth

The SID synth is working!

As I just bought a simple oscilloscope, wave shots follow..


The SID filter works by using two capacitors. I think it works by switching them on and off in sequence. However it works internally, you can experiment with the values of the capacitors. So to experiment without solder/desolder I put a pin header.


So:

The saw


The triangle


The pulse


The noise


The filtered saw with lots of resonance


Now on to a casing.. I had some ideas. But I would like first to get my hands on something to realize it.. Patience is a virtue. I am no virtual, I am real (I think :)